

close
Choose Your Site
Global
Social Media
Views: 0 Author: Site Editor Publish Time: 2026-09-29 Origin: Site


Sample contamination carries a heavy, quantifiable impact in high-stakes laboratory environments. Lost reagent batches waste funding. Compromised assay data ruins months of experimental progress. Delayed regulatory submissions stall research timelines. Procuring high-quality equipment is merely the baseline requirement. The primary failure point often lies elsewhere in the workflow. Operator technique introduces micro-contaminants during routine transfers. Inadequate environmental controls allow airborne particles to settle into open vessels. Mismatched equipment lifecycles degrade internal seals over time. We need a comprehensive framework to evaluate liquid handling workflows. You must select appropriate sterilization hardware for your specific assays. Implementing strict standard operating procedures ensures absolute sample integrity. This applies heavily to sensitive in vitro studies. Mastering these elements transforms a vulnerable process into a robust, repeatable scientific method.
Technique is Inseparable from Hardware: Even the highest-grade sterile pipette requires precise aspiration and dispensing protocols to mitigate aerosolization and cross-contamination.
Consumable vs. Capital Trade-offs: The decision between single-use pre-sterilized tips and a fully autoclavable pipette system hinges on throughput volume, assay sensitivity, and long-term operational costs.
Application-Specific Selection: Workflows involving volatile organics, sensitive peptides, or primary cell lines require specialized cell culture pipette configurations (e.g., dual-filter tips, positive displacement) to prevent vapor-phase contamination.
Lifecycle Maintenance: Routine pipette sterilization must be paired with strict calibration schedules; thermal and chemical decontamination degrades internal seals over time, risking volumetric inaccuracy.
Contamination infiltrates liquid handling workflows through three distinct pathways. Pipette-to-sample contamination happens when a dirty shaft touches a clean liquid. Sample-to-pipette contamination occurs primarily through aerosolization. Sample-to-sample transfer represents standard cross-contamination. Rapid aspiration forces micro-droplets up into the internal mechanism. The air cushion acts like a spring. When decompressed too quickly, liquid shears into microscopic droplets. These droplets bypass standard tips easily. They settle on the internal shaft and O-rings. Subsequent dispensing pushes these hidden contaminants into fresh samples. Effective pipette contamination prevention requires understanding these fluid dynamics. Introducing impure substances compromises study integrity fundamentally. Sensitive peptide or molecular assays amplify these microscopic errors. Trace DNA can ruin an entire PCR run. You must block these vectors before they breach the sterile boundary.
Contamination Vector | Primary Mechanism | Prevention Protocol |
|---|---|---|
Pipette-to-Sample | Contaminated shaft contacts liquid or vessel walls. | Use elongated tips; maintain vertical alignment; routine shaft wiping. |
Sample-to-Pipette | Aerosolization from rapid aspiration or volatile liquids. | Use hydrophobic filter tips; control plunger speed; positive displacement. |
Sample-to-Sample | Carryover from reused tips or internal shaft dripping. | Strict single-use tip policy; pre-wetting tips; routine leak testing. |
Operators introduce significant risks daily despite using sterile equipment. Improper insertion angles push liquid too high into the tip. Touching the tip cone transfers skin oils and aggressive bacteria. Working outside the optimal airflow zones of a biosafety cabinet disrupts the protective air curtain. Fast, jerky plunger movements create violent fluid turbulence. Success requires zero detectable cross-contamination over a defined assay cycle. You validate this success using strict negative controls. Technicians must treat the instrument as an extension of their own sterile field. Proper posture and deliberate movements reduce accidental surface contact. Aseptic technique relies entirely on operator discipline and situational awareness.
Keep elbows off the biosafety cabinet grill to maintain laminar airflow.
Move arms straight in and out of the hood, avoiding sweeping lateral motions.
Never pass non-sterile items over open sterile containers.
Wipe gloves with 70% ethanol frequently during extended handling sessions.
Relying on pre-packaged sterile tips offers immediate convenience. Supply chain reliability can fluctuate unexpectedly, leaving labs stranded. Investing in a fully autoclavable pipette provides operational independence. Repeated autoclaving causes material fatigue over time. Polymer degradation and seal warping occur after numerous thermal cycles. Polycarbonate components withstand heat better than standard polypropylene. You must evaluate manufacturer claims regarding maximum autoclave cycles carefully. Verify consumable certifications before liquid handling begins. Ensure tips are RNase/DNase-free, pyrogen-free, and sterile. This guarantees baseline integrity for sensitive molecular work. Balancing consumable reliance with durable capital equipment requires careful workflow analysis. High-throughput labs often prefer pre-sterilized consumables for speed. Specialized labs benefit from robust, heat-resistant instruments.
A reliable cell culture pipette requires specific protective features to handle biological agents safely. Hydrophobic filter tips block aerosols effectively during aspiration. They prevent vapor-phase contamination from reaching the internal shaft. Air-displacement pipettes rely heavily on these filters for safety. Positive displacement pipettes operate differently using a capillary piston. The piston makes direct contact with the liquid. They handle viscous, volatile, or highly infectious samples perfectly. The sterile boundary remains uncompromised because there is no air cushion. Volatile organics evaporate quickly in standard air-displacement models. This evaporation causes dripping and volume inaccuracy. Positive displacement eliminates this physical limitation entirely.
Feature | Air Displacement (with Filter Tips) | Positive Displacement |
|---|---|---|
Mechanism | Air cushion separates liquid from piston. | Piston directly contacts the liquid. |
Best For | Aqueous solutions, general buffers, high-throughput. | Glycerol, ethanol, infectious blood samples. |
Aerosol Risk | Moderate (mitigated by dual-layer filters). | Zero (no air cushion exists). |
Consumable Cost | Standard filter tips (moderate cost). | Capillary piston tips (higher cost). |
Prolonged use causes significant operator fatigue in busy laboratories. Fatigue directly correlates with a breakdown in aseptic technique. Heavy plungers lead to sloppy aspiration angles and rushed movements. Ergonomic designs reduce thumb strain and wrist deviation. Chemical resistance is equally important for longevity. Equipment must tolerate frequent UV exposure in biosafety cabinets. It must withstand aggressive decontamination agents like RNase AWAY or 10% bleach. Inferior plastics turn brittle and crack under harsh chemicals. Cracked housings harbor dangerous bacterial colonies. Select materials engineered specifically for harsh laboratory environments. Polyvinylidene fluoride (PVDF) offers superior chemical and thermal resistance compared to standard plastics. Durability ensures the instrument remains safe to use over years of service.
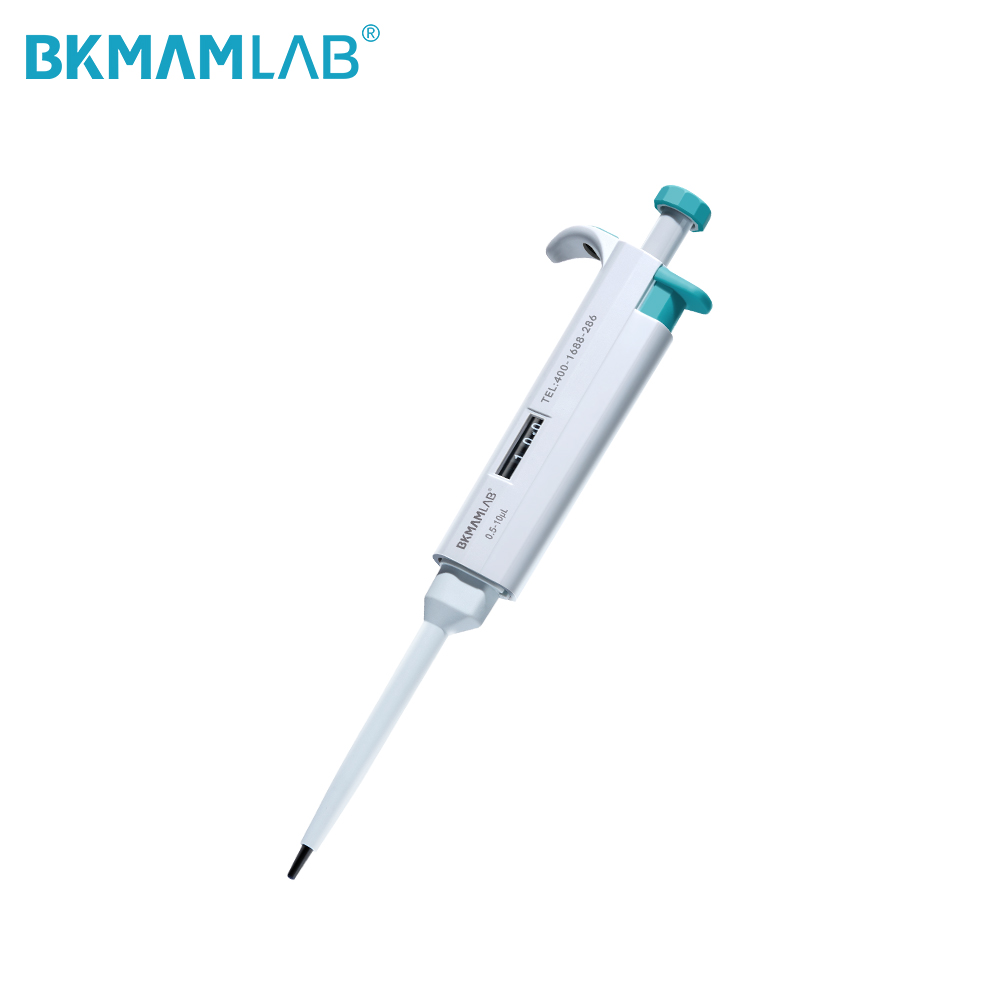
Decontaminate the exterior thoroughly before starting any work. Wipe down the biosafety cabinet before initiating liquid handling. Allow sufficient airflow stabilization time before opening sample tubes. Position tip boxes, waste receptacles, and sample racks carefully. Arrange them to avoid reaching over sterile fields. Mandate the use of dedicated carousel stands on the bench. A Sterile Pipette must never rest horizontally on potentially contaminated benchtop surfaces. Horizontal resting allows liquid to flow backward into the internal mechanism. Organize your workspace from clean to dirty zones. This logical flow prevents accidental cross-contamination during rapid transfers.
Turn on the biosafety cabinet and let the blower run for 15 minutes.
Wipe the work surface with 70% ethanol or a validated sporicide.
Introduce only the necessary tip boxes and sample racks.
Wipe the exterior shaft of the liquid handling instrument with a sterile alcohol pad.
Mount the instrument on a vertical stand inside the hood.
Proper liquid handling relies entirely on applied physics. Maintain a strict 90-degree angle for all aspiration steps. Control the plunger release speed to prevent internal splashing. Utilize a 45-degree angle against the receptacle wall for dispensing. This angle draws the liquid out completely via surface tension. Pre-wet the tip before executing the final transfer. Pre-wetting equilibrates internal humidity within the air cushion. It prevents sample dripping during movement across the bench. Pause briefly after aspiration to allow fluid levels to settle. Rushing this step pulls air bubbles into the tip. Precision requires patience and consistent mechanical rhythm.
Depress the plunger to the first stop outside the liquid.
Submerge the tip just below the meniscus (2-3 mm).
Release the plunger smoothly and steadily to aspirate.
Wait two seconds for the hydrostatic pressure to equalize.
Withdraw the tip straight up, touching it against the vessel wall to remove outside droplets.
Dispense at a 45-degree angle, pressing to the second stop to blow out residual liquid.
Eject tips immediately post-dispense into a designated container. This minimizes environmental exposure to residual sample fluid. Set up localized, biohazard-approved waste containment within the hood. Ensure the waste bin prevents aerosol kickback during ejection. Dropping tips from too high creates a splash hazard. Keep the ejection bin close to the working area. Never eject tips forcefully into a dry, hard-bottomed container. Use a biohazard bag lined with an absorbent pad. This absorbs residual liquid and suppresses aerosol generation. Proper waste management is a core component of aseptic technique.
Follow industry-standard parameters for autoclaving laboratory instruments. Use 121°C at 1 atm for exactly 20 minutes. Disassemble semi-autoclavable models properly before processing them. Remove the lower housing and separate the piston assembly. The post-autoclave drying phase prevents internal moisture buildup inside the shaft. Moisture acts as a vector for rapid bacterial growth. Reassemble the instrument only after it cools completely to room temperature. Apply fresh vacuum grease to the O-rings if required by the manufacturer. Document every autoclave cycle in a dedicated maintenance log. Tracking thermal exposure helps predict when polymer fatigue will occur.
UV light boxes offer convenient surface sterilization. They have strict physical limitations regarding penetration depth. UV radiation cannot penetrate shadow areas or internal components. It cannot fix internal shaft contamination caused by aerosols. Chemical wiping requires specific, documented contact times. Chemical residue can interfere with sensitive downstream assays. PCR, mass spectrometry, and in vitro peptide studies are highly vulnerable. Effective pipette sterilization requires a multi-layered approach. Combine chemical wiping with routine autoclaving for maximum safety. Always rinse away harsh bleach residues with sterile water or ethanol. This prevents long-term corrosion of the plastic housing.
Sterilization frequency correlates directly with calibration drift. Thermal cycling degrades internal seals and alters spring tension. Implement routine gravimetric testing to verify performance. Use distilled water and a calibrated analytical balance. Perform regular leak testing before starting critical assays. Aspirate liquid and hold it vertically for ten seconds. If a droplet forms, the internal seal has failed. This ensures the equipment maintains both sterility and volumetric accuracy. Schedule professional calibration at least twice a year. High-use environments require quarterly professional servicing to maintain ISO compliance.
Set the volume to the maximum capacity.
Aspirate distilled water using a fresh tip.
Hold the instrument vertically over a beaker for 15 seconds.
Observe the tip orifice; any droplet formation indicates a compromised O-ring.
Dispense the water onto an analytical balance to verify the weight matches the expected volume.
Speed often compromises sample integrity in busy laboratories. High-throughput demands lead to rushed, aggressive plunger movements. Operators use incorrect angles when hurried by tight deadlines. Transitioning to electronic models mitigates this risk significantly. They control aspiration speed mechanically via internal motors. This removes operator variability entirely from the equation. Electronic models offer programmable mixing and dispensing protocols. They reduce physical fatigue while maintaining strict fluid dynamics. Balancing speed and safety requires the right technological investment. Motorized control ensures every well in a 96-well plate receives the exact same treatment.
High turnover causes rapid institutional knowledge loss. Aseptic technique degrades without constant, rigorous reinforcement. Implement standardized, documented SOPs for all liquid handling. Require mandatory practical assessments for all new personnel. Do this before granting access to critical cell culture workflows. Adhering to these strict guidelines establishes trust internally. It ensures compliance with GLP/GMP standards during audits. Regular refresher courses keep techniques sharp and consistent. Peer observation helps identify bad habits before they cause contamination. Strong training frameworks protect your data and your reputation.
A sterile instrument is only effective within a rigorously controlled workflow. Proper technique and appropriate hardware selection dictate your success rate. Audit your current contamination rates immediately. Identify workflow bottlenecks before procuring new liquid handling equipment. Prioritize fully autoclavable models for high-risk, infectious environments. Choose electronic models for high-throughput, fatigue-prone tasks. Take action now to protect your samples and secure your data integrity.
Download a comprehensive liquid handling SOP template to standardize lab practices.
Schedule a workflow audit with your laboratory manager to identify contamination bottlenecks.
Request a technical demonstration of advanced positive displacement systems for volatile samples.
Implement a quarterly gravimetric testing schedule for all liquid handling instruments.
A: Frequency depends entirely on your specific application. Sterilize daily when handling infectious agents or highly volatile samples. Weekly sterilization suffices for general molecular biology tasks. Remember that frequent autoclaving accelerates calibration drift, requiring more frequent gravimetric testing to ensure volumetric accuracy remains within acceptable tolerances.
A: A cell culture model requires specific features to maintain sterility. It needs robust UV resistance for biosafety cabinet storage. It must be compatible with sterile, individually wrapped hydrophobic filter tips to block aerosols effectively and prevent mycoplasma cross-contamination between cell lines.
A: No. UV light only provides superficial surface decontamination. It cannot penetrate the plastic housing to reach the internal shaft where dangerous aerosols accumulate. UV must be combined with chemical wiping or autoclaving to achieve true sterility.
A: PCR amplifies even trace amounts of DNA. A single micro-droplet of contaminant can yield false-positive results, ruining the entire assay. Dedicated, pre-PCR sterile equipment is mandatory to prevent this amplification and ensure data validity.
A: Dripping usually indicates a failure of physics, not sterility. It results from vapor pressure changes, thermal disequilibrium, or a lack of tip pre-wetting. Always pre-wet the tip to stabilize the internal air cushion before moving across the bench.
A: Yes. Prolonged exposure to aggressive chemicals like bleach or ethanol dries out internal O-rings. This degradation causes leaks and volumetric inaccuracy, necessitating regular re-greasing and routine leak testing to maintain performance.


